PayPal is a digital wallet that enables buyers to pay using their PayPal balance, bank accounts, or cards. It provides a trusted payment experience with buyer protection and is widely recognized by consumers worldwide.
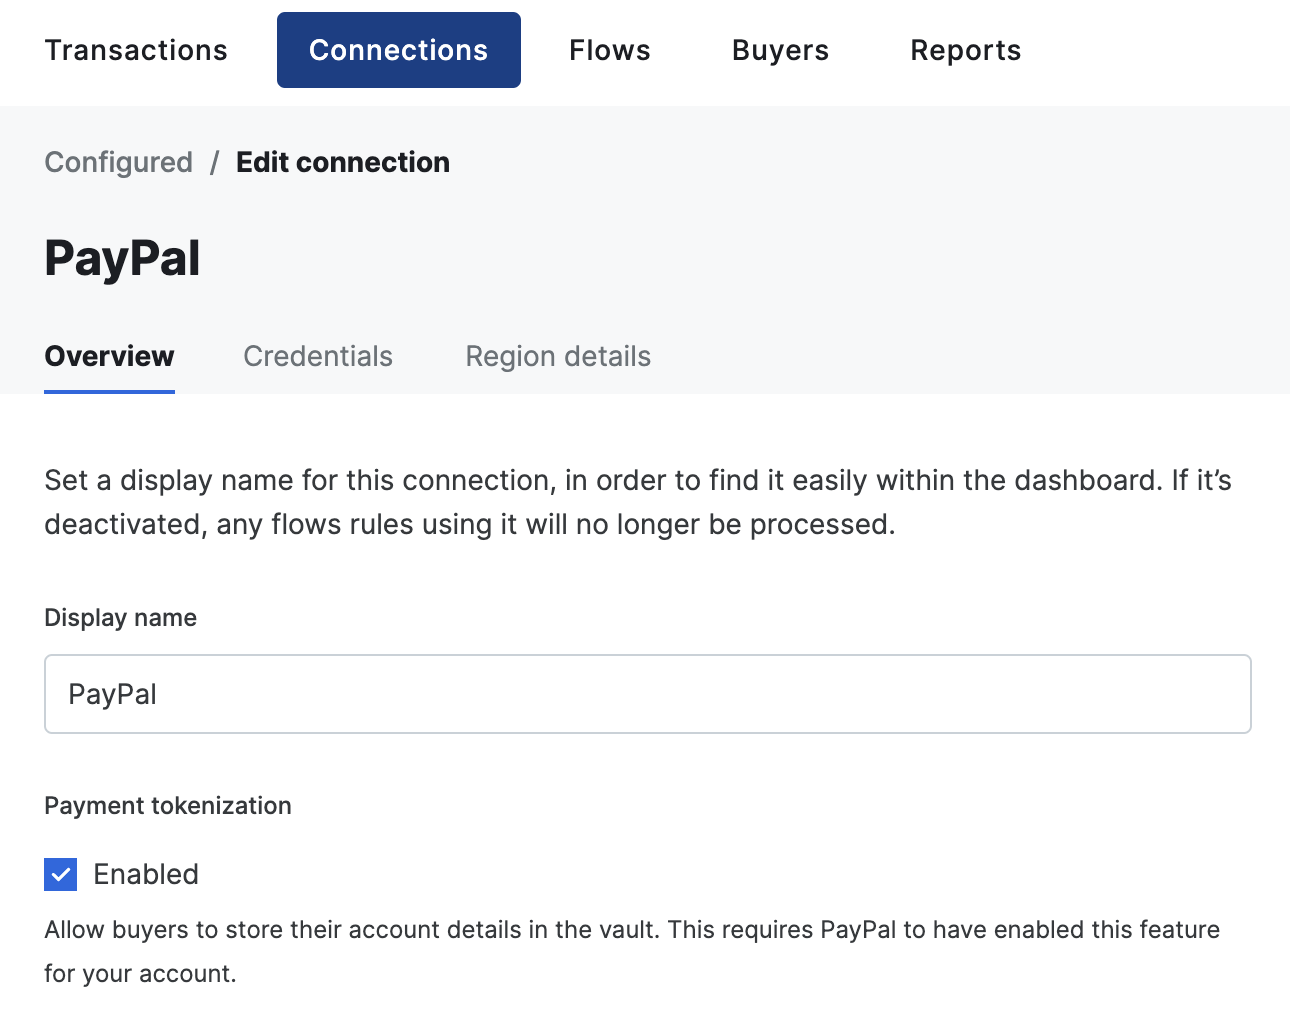
To allow customers to tokenize their PayPal account for future payments, you need to contact PayPal and request that your account be enabled for Vault.Once Vault has been enabled on your PayPal merchant account, you can toggle the tokenization feature on within the PayPal connector settings in the dashboard.
By default, billing, and shipping details received from PayPal are not imported. To enable this feature, head over to Connections → Configured and select your PayPal connector. Next, go to Credentials and toggle Import billing details and/or Import shipping details.When Import billing details is enabled, any of the user’s name, email address, and billing address are automatically imported into your transaction, merging it with any data already present on the transaction. Linked buyers are not updated, but only the snapshot of the buyer on the transaction.When Import shipping details is enabled, the user’s shipping address is automatically requested and imported into your transaction, merging it with any data already present on the transaction. Linked buyers are not updated, but only the snapshot of the buyer on the transaction.
The ingestion of billing and shipping details is not available for tokenized payments.
When Import shipping details is enabled, you can configure PayPal to call your server whenever the buyer changes their shipping address or selects a different shipping option during checkout. This lets you return updated shipping costs and available options in real time.To enable this, pass order_update_callback_config in connection_options["paypal-paypal"] when creating a transaction:
Field
Description
callback_url
The URL PayPal calls when the buyer updates their shipping details.
callback_events
Array of events to subscribe to. "SHIPPING_ADDRESS" fires when the buyer changes their shipping address; "SHIPPING_OPTIONS" fires when they change their selected shipping option.
When order_update_callback_config is set and shipping ingestion is enabled, Gr4vy sets the PayPal shipping_preference to GET_FROM_FILE so the buyer’s shipping details flow through your callback endpoint rather than being provided upfront.
var transaction = await client.Transactions.CreateAsync( transactionCreate: new TransactionCreate() { Amount = 1299, Currency = "USD", Country = "US", PaymentMethod = TransactionCreatePaymentMethod.CreateRedirectPaymentMethodCreate( new RedirectPaymentMethodCreate() { Method = "paypal", Country = "US", Currency = "USD", RedirectUrl = "https://example.com/callback", } ), ConnectionOptions = new Dictionary<string, object>() { ["paypal-paypal"] = new Dictionary<string, object>() { ["order_update_callback_config"] = new Dictionary<string, object>() { ["callback_url"] = "https://example.com/shipping-callback", ["callback_events"] = new List<string> { "SHIPPING_ADDRESS", "SHIPPING_OPTIONS" }, } } } });
You can customize the PayPal Checkout page by passing any of the following fields in connection_options["paypal-paypal"] when creating a transaction.
Field
Description
user_action
Controls the label on the PayPal Checkout button. "PAY_NOW" (default) shows an immediate pay button; "CONTINUE" shows a continue button for deferred-payment flows.
shipping_preference
Controls how the shipping address is sourced during checkout. "NO_SHIPPING" hides the shipping address fields; "GET_FROM_FILE" lets the buyer provide or change their address during checkout; "SET_PROVIDED_ADDRESS" pre-fills the address you supplied and prevents the buyer from changing it. When omitted, Gr4vy determines this value automatically (see the note below).
brand_name
The merchant brand name displayed on the PayPal Checkout page. Maximum 127 characters.
landing_page
The page shown to the buyer when they arrive at PayPal. "LOGIN" opens the PayPal login page; "GUEST_CHECKOUT" opens the guest checkout page; "NO_PREFERENCE" lets PayPal decide.
locale
A BCP 47 locale tag used to localize the PayPal Checkout page, for example "en-US" or "fr-FR".
"GUEST_CHECKOUT" for landing_page only takes effect if PayPal account optional is enabled in your PayPal merchant account settings. If the setting is not enabled, PayPal falls back to showing the login page regardless.
locale is a hint to PayPal and may not always be honored. PayPal also determines locale from the buyer’s browser cookies and the configuration of its own SDK, so the effective locale can differ from the value you provide.
shipping_preference is automatically determined by Gr4vy when not set. It is set to GET_FROM_FILE when order_update_callback_config is set and shipping ingestion is enabled, SET_PROVIDED_ADDRESS when a shipping address is supplied on the transaction, and NO_SHIPPING otherwise. Setting shipping_preference explicitly overrides this automatic behavior.
By default, PayPal only settles payments automatically if the payment is in the primary currency of the PayPal merchant account. If you need to accept payments in additional currencies, you need to open a PayPal account balance in each of the currencies you intend to accept. Alternatively, you can configure your PayPal merchant account to automatically convert payments into the primary currency.If you receive a payment in a currency that your PayPal merchant account is not configured to accept, the payment enters a pending state and you need to log in to the PayPal merchant dashboard to trigger settlement, either by opening the required currency balance, or converting the payment into the primary currency of your PayPal account.
Payments left in a pending state are eventually reversed by PayPal.
FraudNet is a PayPal-developed JavaScript library that collects browser-based data to help reduce fraud. Upon checkout, the FraudNet library sends data elements to PayPal Risk Services for fraud and risk assessment.When creating transactions, the PayPal FraudNet library must be included on the checkout page for all transactions. When using Embed, the PayPal FraudNet library is included automatically. If you are using the API directly, you need to use the device fingerprinting library which includes the PayPal FraudNet library.
For PayPal, the default integration is through a redirect to PayPal’s hosted checkout page.Start by creating a new transaction with the following required fields.
var transaction = await client.Transactions.CreateAsync( transactionCreate: new TransactionCreate() { Amount = 1299, Currency = "USD", Country = "US", PaymentMethod = TransactionCreatePaymentMethod.CreateRedirectPaymentMethodCreate( new RedirectPaymentMethodCreate() { Method = "paypal", Country = "US", Currency = "USD", RedirectUrl = "https://example.com/callback", } ), });
After the transaction is created, the API response includes payment_method.approval_url and the buyer_approval_pending status.
Redirect the buyer to the approval_url so they can log in to PayPal, review the transaction, and approve the payment. After approval, the buyer is redirected to the redirect_url you provided when creating the transaction. Do not rely solely on the redirect - either poll the transaction or (recommended) rely on webhooks to detect the final status (for example capture_succeeded or failure states).
PayPal provides client SDKs for a direct integration where PayPal’s own checkout UI runs on your page or in your app. The two platforms differ in one important way:
Web renders PayPal’s Smart Button on the page before the buyer acts, and the button needs the PayPal clientId to load. To get that without creating a transaction on every page load, you preload the connection’s clientId/merchantId from a standalone session, then create the transaction and PayPal order lazily inside the SDK’s createOrder callback.
Mobile does not need this preload. PayPal’s native iOS/Android SDK is launched with an order that already exists, so you create the transaction when the buyer taps and hand the resulting orderId to the SDK — there is no button to render up front.
Pick your platform below. Both finish with the shared completion step.
A minimal end-to-end web example is available at gr4vy/sample-paypal-direct. It pairs an Express server that proxies the standalone session and creates the transaction through the Gr4vy SDK with a vanilla-JS frontend that renders the PayPal Smart Button and creates the order on click.
Web
Mobile
The Smart Button renders on page load, so you preload the clientId/merchantId and defer the transaction to createOrder.
On page load, fetch the standalone session to get the connection’s clientId and merchantId. This requires the transactions.write scope, so call it from your server. It creates no transaction and makes no call to PayPal.
var session = await client.PaymentServices.SessionAsync( paymentServiceId: "<payment_service_id>", requestBody: new Dictionary<string, object>());// session.ResponseBody contains clientId and merchantId
The response body holds just the two IDs. It contains no orderId, because no order exists until the buyer clicks.
{ "clientId": "Ac3..._8", "merchantId": null}
This call is optional. The clientId and merchantId are static connection values, so if you already have them you can skip the standalone session and pass them straight to the PayPal JS SDK. The session endpoint exists so you don’t have to hard-code or separately distribute the connection’s credentials to your frontend.
Also on page load, initialize the PayPal JS SDK with the clientId from the standalone session and render the Smart Button. Set currency to the same currency as the order you create in createOrder (a mismatch fails the integration), and set intent to match the connection’s configured intent. The button defers the work to its createOrder callback, so the transaction and order are created on click (steps 3 and 4).
// From the standalone session in step 1:const { clientId, merchantId } = standaloneSession;// Load the PayPal SDK with the clientId. Set the intent parameter to match the// transaction intent and the connection's configured intent (authorize or capture).// This example uses capture, matching the transaction and session data below:// <script src="https://www.paypal.com/sdk/js?client-id=${clientId}¤cy=USD&intent=capture"></script>//// When merchantId is not null, add it as the merchant-id parameter:// <script src="https://www.paypal.com/sdk/js?client-id=${clientId}&merchant-id=${merchantId}¤cy=USD&intent=capture"></script>let defaultCompletionUrl = null;paypal.Buttons({ fundingSource: paypal.FUNDING.PAYPAL, createOrder: async function() { // Step 3: your server creates the transaction (needs the private key). const { transactionId, sessionToken } = await createTransaction(); // Step 4: exchange the session token for the orderId and completion URL. const session = await fetchTransactionSession(transactionId, sessionToken); defaultCompletionUrl = session.default_completion_url; return session.session_data.orderId; }, onApprove: function() { // After the buyer approves, navigate to the default_completion_url to // finalize the transaction. That URL returns an HTTP 303 redirect back to // your redirect_url with the transaction result appended. window.location.assign(defaultCompletionUrl); }}).render('#paypal-button-container');
Inside the SDK’s createOrder callback, create a transaction with the integration_client set to web. Keep this call server-side. Set the transaction intent to match the connection’s configured intent.
var transaction = await client.Transactions.CreateAsync( transactionCreate: new TransactionCreate() { Amount = 1299, Currency = "USD", Country = "US", IntegrationClient = "web", Intent = "capture", PaymentMethod = TransactionCreatePaymentMethod.CreateRedirectPaymentMethodCreate( new RedirectPaymentMethodCreate() { Method = "paypal", Country = "US", Currency = "USD", RedirectUrl = "https://example.com/callback", } ), });
Still inside createOrder, use the session_token from the transaction response to get the session data. This returns the orderId and a default_completion_url. It is meant to be called from the frontend and is not exposed in the SDKs, so call it with a plain request authenticated by the session_token. Return the orderId from createOrder so the PayPal SDK can open the approval flow.
POST /transactions/:transaction_id/session?token=:session_token
No standalone session is needed: PayPal’s native SDK is launched with an order that already exists, so you create the transaction when the buyer taps and pass the resulting orderId to the SDK.
Create a new transaction with the integration_client set to ios or android. Use your app deep link for redirect_url (for example, yourapp://).
var transaction = await client.Transactions.CreateAsync( transactionCreate: new TransactionCreate() { Amount = 1299, Currency = "USD", Country = "US", IntegrationClient = "ios", PaymentMethod = TransactionCreatePaymentMethod.CreateRedirectPaymentMethodCreate( new RedirectPaymentMethodCreate() { Method = "paypal", Country = "US", Currency = "USD", RedirectUrl = "yourapp://callback", } ), });
Use the session_token to get the session data for mobile.
POST /transactions/:transaction_id/session?token=:session_token
After the buyer completes the payment flow, the PayPal SDK provides an onApprove callback (Web) or a completion block/callback (Mobile). To finalize the payment, call the tokenized default_completion_url from the session response. This URL is safe to call from the client as it contains an embedded token.On Web, navigate the browser to the URL (for example, window.location.assign(default_completion_url)) so it follows the HTTP 303 redirect back to your redirect_url. On Mobile, send a GET request to the URL from your completion callback.
GET :default_completion_url
The system automatically authorizes or captures the transaction once you call the approval endpoint. If intent=capture, the system captures the transaction.Please refer to the PayPal SDK documentation for further guidance.
PayPal provides a sandbox environment for testing transactions. After setting up your sandbox PayPal developer account, you can create test buyer accounts in the PayPal Developer Dashboard.Use these test buyer accounts to log in during the redirect flow and approve test transactions. The sandbox environment simulates the production flow without processing real payments.For detailed testing instructions and test account setup, see the PayPal Developer documentation.